
Jenkins CI/CD pipeline for Microservices Deployment on Kubernetes
- Ankush Madaan
- Blog
About
Industries
- CI/CD Pipelines, Featured, Jenkins, Kubernetes, Microservices
Share Via
Introduction
The objective behind this guide is to help set up a simple and efficient CI/CD pipeline using Jenkins for hundreds of microservices running in Kubernetes on AWS EKS.
The approach will be developer-friendly and straightforward, easy to maintain, and one that has proved to be effective on some large scale production deployments. Step by step guide for the entire setup is listed below
Jenkins Installation
To start with, we need Jenkins running on an EC2 instance. [ Running Jenkins inside the Kubernetes cluster has its own set of challenges to solve for docker builds ].
The Internet is flooded with articles on How to install Jenkins, But it is recommended to follow the official guide. Some basic requirements also need to be fulfilled before this setup is ready for use.
- Docker
- AWS CLI
- Helm 3
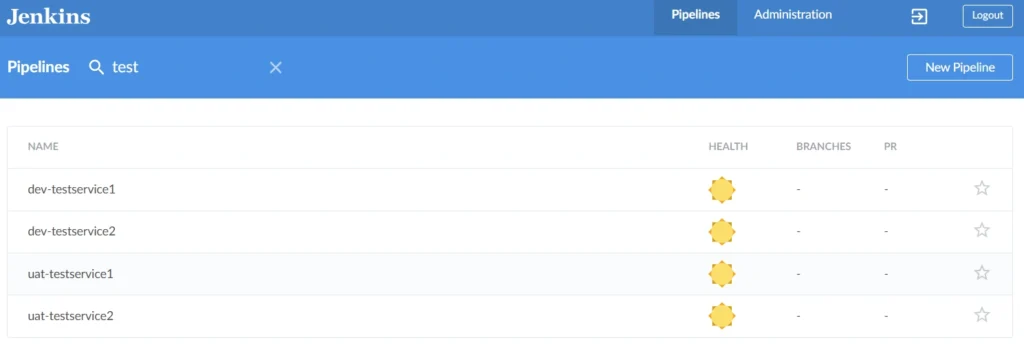
We recommend using the Blueocean plugin which provides a beautiful user interface for Jenkins and configures our load balancer to the Blueocean interface on login.
Blueocean UI for Jenkins:
Other plugins that need to be installed, in order to get the setup up and running are:
- Slack Notification Plugin
- Role-based Authorization Strategy
- Authorize Project (Configure projects to run with specific authorization.)
- Amazon ECR plugin
One critical aspect is Jenkins’s authentication with AWS services like ECR and EKS. Always prefer to use IAM instance Role [ This role ARN also needs to be added to AWS-auth configmap in EKS cluster ]. Here is a list of IAM policies to be attached to IAM role
- AmazonEKSClusterPolicy
- AmazonEKSServicePolicy
- AmazonEKSWorkerNodePolicy
- ECRFullAccess
- eksClusterAutoscalerPolicy
Git flow and Branching strategy
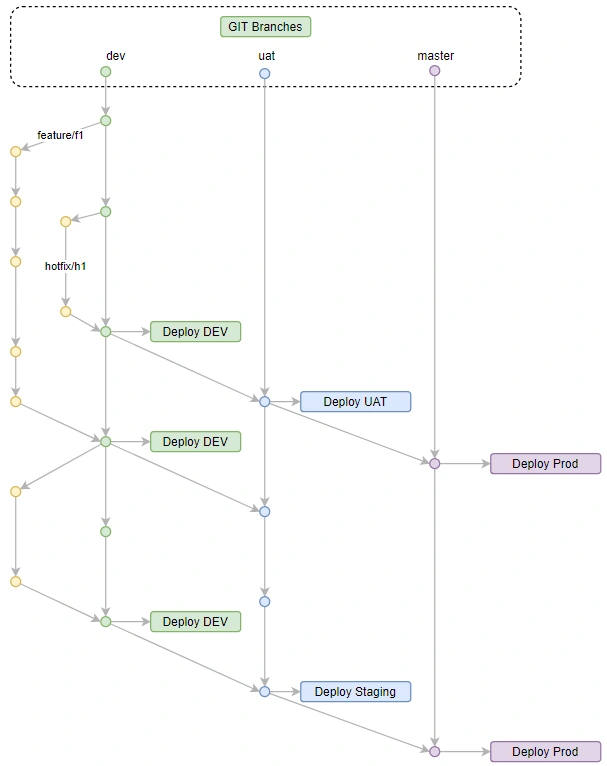
This article refers to a simple branching strategy, with 3 mainline branches mapped to 3 environments running in the Kubernetes cluster. Each environment is running in it’s Kubernetes namespace.
git-flow for deployment stages :
Build Instructions :
In a typical microservices-based architecture, each microservice can be developed in a different programming language or framework. This puts Docker to it’s best use case. All the build instructions for a particular microservice stay in Dockerfile placed at the root of each repository.
Deployment Instructions
The deployments are packaged as helm charts that define all aspects of a microservice like — container images, placement constraints, networking, storage, configurations, etc.
These helm charts are stored in a separate git repository, which includes per service helm chart as well as other resources like common configmaps and secrets, ingress and different routing configuration, etc. These are fetched on Jenkins server as a dedicated Jenkins job with webhook configured to fetch updates automatically.
Pipeline — Putting it all together
Consider a simple pipeline having the following stages.
- Source
- Build and Test
- Artifact
- Deploy
- Cleanup ( Crucial part of the pipeline )
- Notify
Since the environment is independent of the EKS cluster name, it should be decoupled. Hence we configure cluster names corresponding to each environment as Jenkins Global Environment Variables in Manage Jenkins→Configure System→Global properties→Environment variables. These environments are being fetched from Git branch names like if the BRANCH is under development the ENV will be DEV i.e. ENV=${GIT_BRANCH}_env
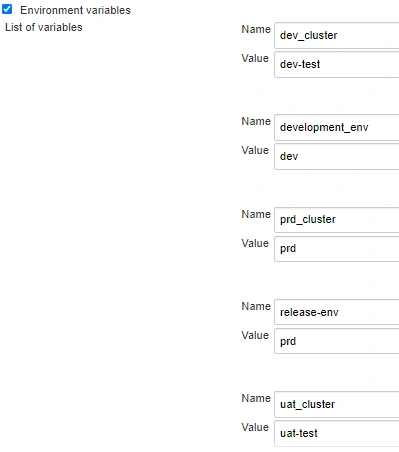
Global environment variables for branch and cluster settings per CI stage
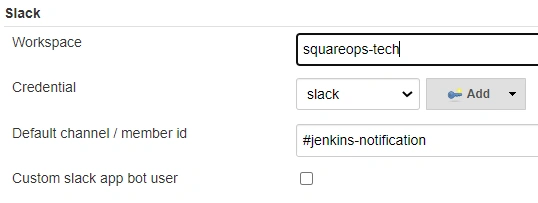
Slack Configuration for build notifications:
Git credentials: To setup Github webhooks, make sure Github Plugin is installed in Jenkins. Go to your Github repo -> Settings -> Webhooks. Add public URL of Jenkins as Payload URL, it will tell Github where to send the webhooks as below:
https://jenkins.example.com/github-webhook/
Now add Jenkins SSH public key to source code repositories. Add private ssh key to Jenkins credentials store and note the ID of the credential.
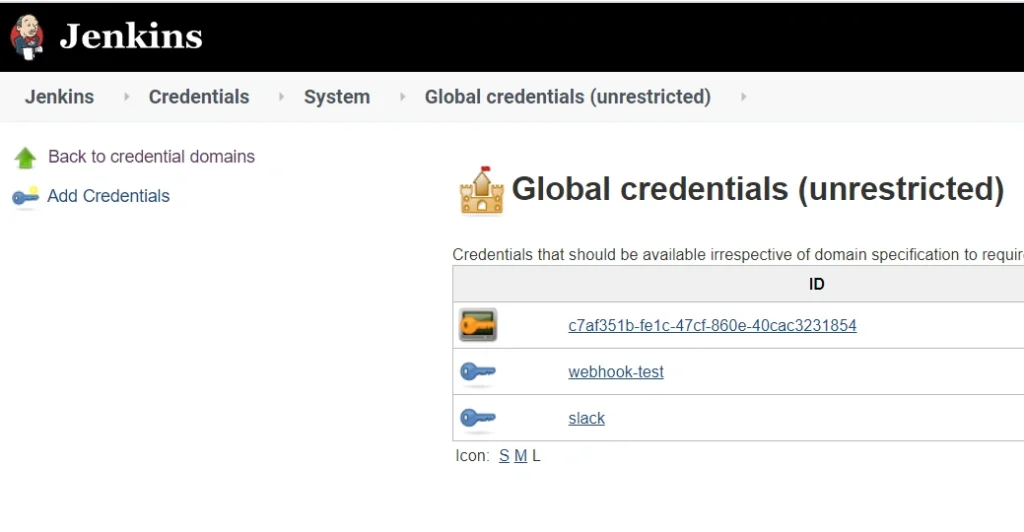
Go to Credentials → System → Global Credentials
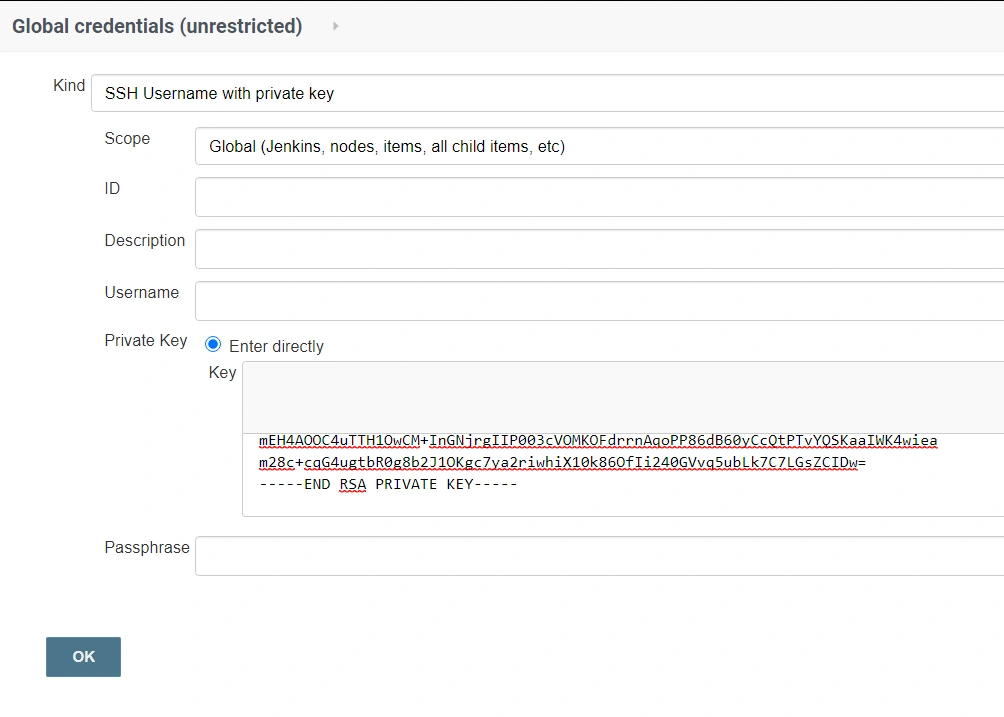
Add Credentials of the Kind using the SSH Username with Private key ( for the public key added to GitHub )
For Slack Integration: Refer to this article.
Jenkins file example with github webhooks and slack notification.
This Jenkinsfile is independent of microservice or environment. You can have a single Jenkins file for all microservices or can use separate Jenkins files stored in git for every microservice.
Let’s configure a Multibranch Pipeline Jenkins job to use the above-mentioned pipeline file
Creating a multibranch Pipeline
In Jenkins
Create New Item and Choose Multibranch Pipeline

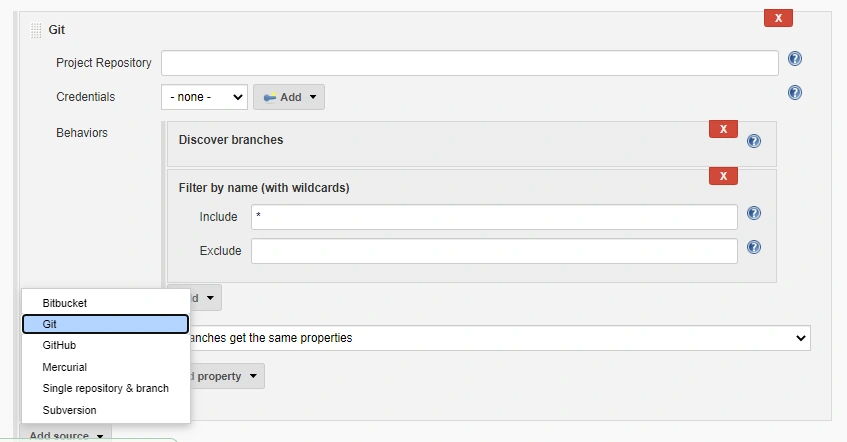
In Branch Source, update your Git repository and credential, then you can keep the default behaviour for auto discover branches, or you can filter branches by name.
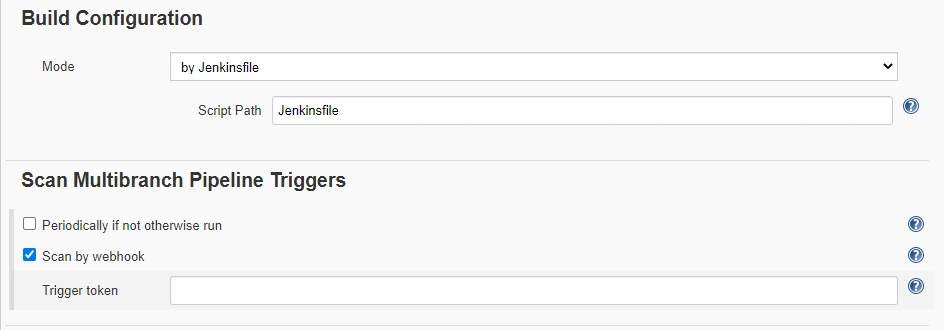
In Build Configuration, use Jenkinsfile and update your file path.
In Scan Multibranch Pipeline Triggers, choose Scan by webhook and setup Trigger token or use periodically. In the case of Scan by webhook Multibranch Scan Webhook Trigger plugin is required.
Save your configuration and then Click Open Blue Ocean, it would auto-discover your Github branch and the pipeline you defined in Jenkinsfile
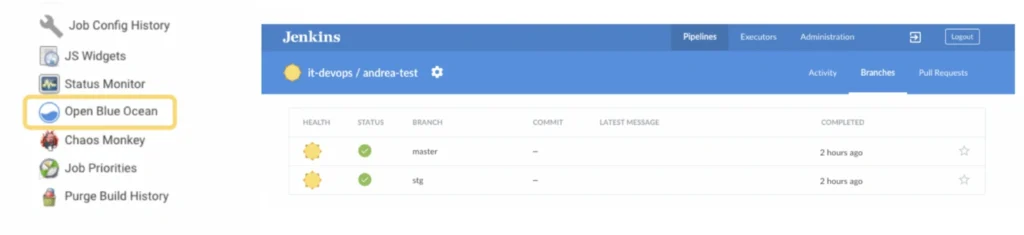
After making a commit to a specific branch, you should see the pipeline initiation of that branch, followed by the final deployment.

The Jenkins job is now ready for use. Replicate the same flow across all microservices.
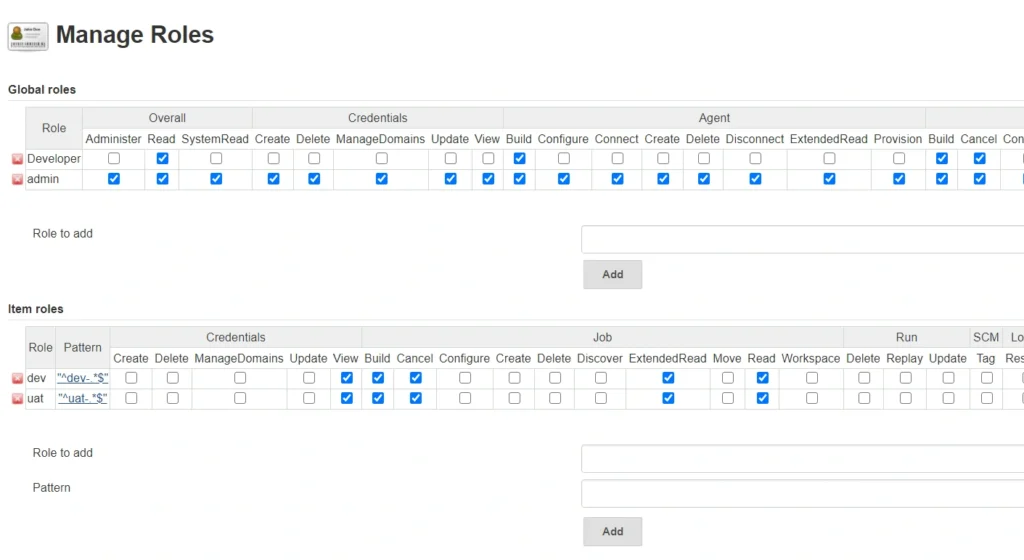
Jenkins Access control and Management
Install Jenkins role based access control plugin to enable Manage and Assign Role option under Manage Jenkins
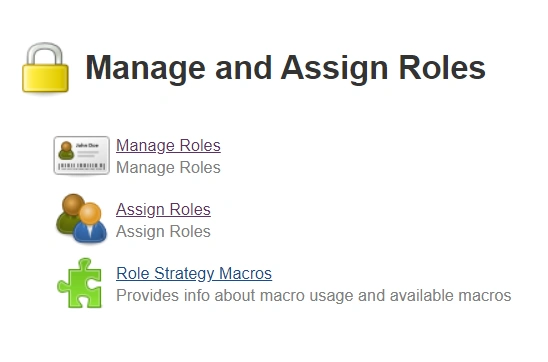
Add new roles under Manage Roles
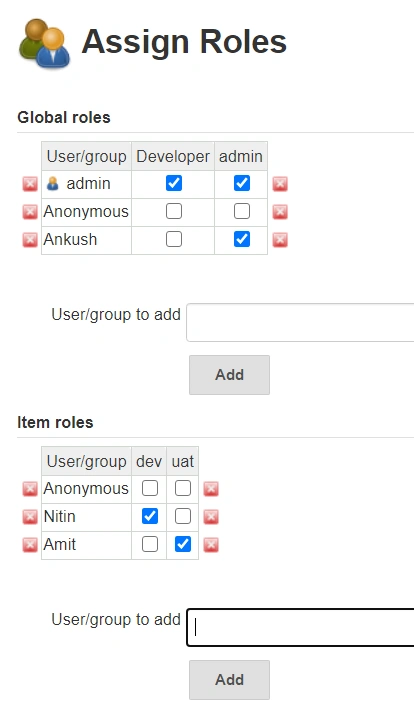
And assign roles to users
Now you should be able to build and deploy your own pipelines using Jenkins. This will be your first step at establishing a continuous integration and continuous deployment cycle and incorporating a DevOps culture into your workflow. This method ensures efficient management of AWS & microservices deployed on AWS EKS
Frequently asked questions
Jenkins is an open-source automation tool used to build, test, and deploy applications, commonly in a CI/CD pipeline.
Jenkins can orchestrate the CI/CD pipeline for microservices, automating builds, tests, and deployments to Kubernetes clusters, improving speed and reliability.
Essential plugins include the Kubernetes plugin, Docker plugin, Git plugin, and Blue Ocean (for visualizing pipelines).
Configure a Kubernetes Cloud in Jenkins with your cluster details (e.g., kubeconfig or service account credentials) to enable Jenkins to deploy workloads on Kubernetes.
Using multi-branch pipelines or separate pipeline files for each service, Jenkins can independently build, test, and deploy multiple microservices in parallel.
Docker builds images for each microservice, which are then stored in a container registry and deployed to Kubernetes.
Jenkins can use Kubernetes CLI commands or Helm charts within a pipeline script to perform rolling updates, ensuring smooth version deployments.
Use Jenkins credentials for sensitive information, and/or Kubernetes secrets for secure storage, accessible through the pipeline.
Jenkins offers built-in error handling and notification plugins (e.g., email, Slack) to alert developers of failures in the pipeline.
Yes, Jenkins can be scripted to detect failures and trigger a rollback, often managed with Helm or custom Kubernetes commands.
Related Posts
Comprehensive Guide to HTTP Errors in DevOps: Causes, Scenarios, and Troubleshooting Steps
- Blog
Trivy: The Ultimate Open-Source Tool for Container Vulnerability Scanning and SBOM Generation
- Blog
Prometheus and Grafana Explained: Monitoring and Visualizing Kubernetes Metrics Like a Pro
- Blog
CI/CD Pipeline Failures Explained: Key Debugging Techniques to Resolve Build and Deployment Issues
- Blog
DevSecOps in Action: A Complete Guide to Secure CI/CD Workflows
- Blog
AWS WAF Explained: Protect Your APIs with Smart Rate Limiting
- Blog